Krzysztof Tryc's (lunar) Reef Aquarium

Display tank: (approximately) 750 liters (198 US gallons); 160 x 80 x 55

"Marko's Reef" that already was a TOTM in 2003

It's hard to believe that a reef with this size and bioload can be support without skimmer ...

Juanko Reef

Nothing is impossible..

Vidae TOTM 2009

Fully Zeovit Stuff..

Friday 20 July 2012

Does The Reef Tank Need Carbon - By The Reef Geek

There is no doubt that the biggest selling maintenance product in the aquarium industry is Activated Carbon. This long time filter media started as Bone Charcoal 150 years ago, and it’s been keeping aquarium water sparkling clear ever since.
In the aquarium trade, activated carbon is sold in more products than you think. It is the key ingredient in HOB disposable filter cartridges, and is often blended with ion exchange resins, ammonia removers, and other chemical media that makes up hundreds of aquarium products . And of course, it is sold in bulk or pure form for use in canister filters, mesh bags, and media reactors.
Why do we keep using it? Any veteran freshwater or marine aquarist can tell you that it removes odors, removes color, and makes aquarium water as clear as ice. Despite the beauty of your show tank, no one likes to walk into your living room and get a whiff of that “fishy” smell.
There is a lot of confusion about how activated carbon acts in saltwater, especially when it is used in reef aquariums. Here, aquarists are constantly pushing for a more natural filtration approach. But it bugs the hell out of me when I read all the misinformation on the Internet and even on carbon product labels. They preach to use carbon sparingly, like one day or three days a month, or don’t use it all. Folks, Activated Carbon is non-toxic. It cannot be overdosed. It will not remove all the salts and trace elements and turn your tank into some incomplete blend of synthetic seawater.
We all need to realize that our reef and fish-only aquariums are NOT miniature slices of the ocean. They may look that way, but bio-chemically they are an ecosystem that is always on the verge of collapse. Activated Carbon’s job is to remove metabolic wastes, or more commonly called organics. You can employ the deepest sand bed or the largest calcium reactor or a humongous circulation pump, but none of these things will have any effect on organics.
When it comes to organics, the world’s oceans maintain a perfect balance of metabolic waste removal through a series of natural recycling systems. Both the volume of water and the immense surface area provides a home for tens of thousands of species of macro and micro organisms that process these wastes. In the home aquarium, just a small fraction of these organisms can survive. Coupled with an extremely high specimen to water ratio, organics tend to accumulate in closed systems, and can reach concentrations orders of magnitude beyond natural ocean levels. Even with aggressive water changes, these organics can never be diluted enough to mimic the natural levels where our livestock has lived for thousands of years.
Don’t confuse organics with ammonia, nitrites, or nitrates. The bacteria responsible for breaking down these nutrients naturally thrive in all aquariums. Most tanks are nutrient rich and provide lots of food for these bacteria to thrive. Organics on the other hand, consists of complex metabolic compounds including phenols, organic acids, proteins, fats, carbohydrates, and hormones. To break these down, we don’t (and can’t) grow the right bacteria in our aquariums. In fact, detritus on the gravel surface and in the bottom of the sump are organic compounds that have reached such high concentrations that they fall out of solution. These particles remain inert as long as pH, oxygen, and ORP levels stay constant. Any wild swings or disruptions will trigger detritus particles to release these pollutants back into solution, causing an avalanche effect which will fuel a tank crash like there’s no tomorrow.
Where Do Organics Come From?
Creation of organics is a natural process of fish and invertebrate metabolism. 
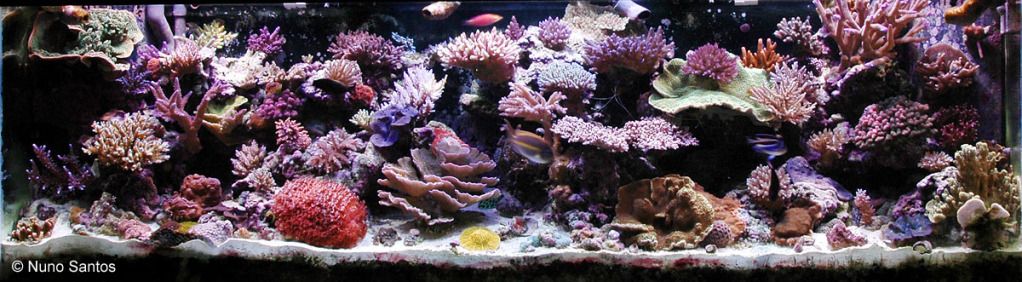
It has little to do with the amount of food added to the tank. Reef tanks are especially vulnerable to organics, since corals and invertebrates produce a lot more organics than fish. Coral “slime” is nearly 100% pure organics. When you are mounting a coral or moving things around, copious amounts of sliming results. This slime is torn apart by powerheads, oozes through mechanical filters, and finally winds up being dissolved in the aquarium water. By contrast, coral slime in the ocean is quickly washed away perhaps hundreds of meters away from the coral. It is then consumed whole by other invertebrates or fish or quickly broken down by specialized bacteria and used by plankton as food. Everything is recycled in the ocean. In the aquarium, it has to be removed.
Why Organics Are Bad
While only a few of the organic compounds are directly toxic to marine livestock, they can stimulate the growth of heterotrophic bacteria which robs your tank of oxygen. These bacteria also create carbon dioxide. The result is lower pH and low ORP, which creates ideal conditions for nuisance algae to thrive. Organics can quickly tint aquarium water to a yellow color which greatly blocks blue spectrum light penetration (actinic 420nm). High levels of organics can also tax a protein skimmer to the point where nitrates and phosphate removal becomes minimal.
No one knows for sure the total make up of organic compounds in the marine aquarium and what specific effects they have on different organisms. It had been observed that aquariums with high organic levels experience more fish and coral diseases. There is now firm evidence that organics stunt fish growth. The old mystery of how a fish will grow only as large as its container has been solved. It has nothing to do with the volume of water or the size of the tank- organics accumulation is the culprit.
At moderate organic levels, corals and invertebrates tend to close or cease reproduction. Some researchers believe that there is a direct relationship between high levels of organics and dense populations of disease organisms. The reduction of naturally occurring organics ultimately leads to improved water quality and healthier specimens. Activated Carbon is the most effective and easiest method of removing organics from aquariums.
How to Tell if Your Organics Levels are High
The tell tale signs of high organics in marine aquariums include (1) Persistent hair algae problems despite low nutrient levels, (2) Some foaming in the sump or in the corners of the tank, (3) An oily film or cloudy layer on the water surface where even a tank overflow can’t seem to get rid of all of it, and (4) small growths of Cyanobacteria spotting on rocks and the gravel.
How Activated Carbon Works
Activated carbon is a unique product that starts out as nut shells, wood, or coal. It is pyrolysed in a 750°C oven which cracks the material and creates millions of micro pores on the surface and though the interior of each grain. The surface area of these pores are immense. One gram of granular activated carbon has 5,300 square feet of surface area. By comparison, a tennis court is 2,800 square feet. It is not only the large surface area of carbon that attracts organics, but there is an electrical charge involved that draws organics to the carbon.
Choosing Activated Carbon
In the aquarium trade, bulk activated carbon is sold in granular and extruded forms. Extruded products appear as pellets and spheres. These carbons are more rugged and can take tumbling in media reactors without breaking apart. They also tend to have less dust. However, extruded carbons have less surface area than granular carbons, so more product will be needed to achieve the same results. Granular carbons are softer and are more dusty. Dust level has nothing to do with the quality or effectiveness of carbon.
There are lots of brands of activated carbons to choose from. The quality ranges from downright detrimental to excellent. Avoid any product that uses the term “charcoal” or “char” in its name. These products are not activated and are limited to removing heavy metals and odors. There are ineffective against organics. They also contain calcium phosphates- which act as a nutrient for algae growth.
Activated Carbon has gotten a reputation of adding or leaching phosphates back into the water. This is only partially true. Activated Carbon can be made in two ways, either by Physical Activation or Chemical Activation. Physical activation used CO2, oxygen, or steam, and contains no phosphates. Chemical activation uses phosphoric acid and zinc for activation. If you buy the latter, then adding carbon will also add phosphates to your water. You are better off not using carbon at all then using a phosphate washed product.
Here’s a guide on what to look for when buying activated carbon:
Look on the product label for information about the carbon. If the label talks about the carbon process of using steam, oxygen, or carbon dioxide, then it is truly phosphate-free and won’t leach phosphates into the water. Some carbons are simple marked “Phosphate-Free” which indicates a steam activated process. If the label does not mention phosphates, doesn’t tout the activation process, or requires rinsing to minimize phosphates, it is likely a low grade phosphor-washed carbon that should be avoided.
If you use your carbon in a media reactor or tumbler, buy an extruded or pelletized carbon. It won’t break apart when the grains bang into each other. For use in canister filters or mesh bags, use granular carbon. It will give you more surface area- albeit at the cost of being softer and more fragile.
Ash is an inorganic material that is left behind after the activation process. Look for carbon that is marked as low ash content or one that states “Does not affect PH”. High ash content can cause a significant rise in PH when first placed in the aquarium. This can cause undue stress on the livestock. I have personally seen pH values climb within minutes from 8.0 to 9.5 pH with some carbons. All carbons contain some ash and a thorough rinsing in fresh water will remove most of it.
Quality brands of activated carbon will feature other parameters, such as Iodine Number below 600, Molasses Number above 400, or listing pore size in Angstroms. These are all signs of a quality manufacturer that has nothing to hide, and is offering a superb product.
BRAND
Average
Good
Excellent
Aq Pharm Black Magic®
Kent Reef Carbon®
Boyd Chemi-Pure®
Hagen® Fluval® Carbon
Hydor Prime®
Lifegard® Pelletized
Marineland Black Diamond®
ROWAcarbon®
Seachem Matrix®
T.L.F. Hydrocarbon®
Warner® Granular
How To use Activated Carbon
For ongoing maintenance, I recommend 1 cup per 60 gallons of water. This is a bit higher than most suggestions, but using more carbon works faster and lasts longer. Double this amount for tanks with obvious signs of high organics or first time carbon use in poorly maintained tanks.
Filter the water mechanically before it reaches the carbon. Particles greater than 100 microns in size will take a toll on the life of the carbon.
Despite popular belief, carbon does not need to be placed in a canister filter or a compartment where all tank water passes through it. Dropping a mesh bag full of carbon into the sump works fine. This is because carbon works by electrically attracting particles- it is not an inert mechanical filter. Studies have shown that bags of carbon in a sump with moderate flow removes substantial quantities of organic pollutants, medications, and heavy metals. Actual performance depends on the flowability of the bag material. It is most effective if you use a media bag with the largest possible hole sizes but small enough where the carbon cannot escape.
For the average marine fish aquarium, carbon will last 6 weeks. Reef tanks produce more organics than fish-only tanks, so 4-6 weeks is a workable limit. If the water is not mechanically filtered or the aquarium shows signs of nuisance algae, you will need to adjust the useful life or increase the amount of carbon.
There is no effective way for the aquarist to either recharge carbon or measure its rate of exhaustion. I have experimented with the Salifert Organics Test Kit to measure carbon life, but I was unsuccessful because the range of the test kit would not allow me to measure steady declines over time. Don’t re-use carbon or try to clean it. Recharging carbon requires a specialized high temperature/low oxygen oven that would be prohibitively expensive at this small scale. The best solution is to replace the carbon at 4 to 6 week intervals.

Activated Carbon Myths and Misconceptions
Carbon removes trace elements- Carbon has a greater affinity for organics than trace metals, but it will remove some trace elements. On the other hand, both protein skimming and natural consumption of trace elements by tank specimens will remove significantly more trace elements than carbon. Aquarists concerned about depleted trace elements should be using a trace mineral additive- whether or not carbon is used. Two excellent products for this are the Sera Strontium Complex and the Seachem Reef Trace products.
Carbon will leach organics back into the water False. Once all the carbon pores are saturated, bacteria slime and detritus will accumulate on the carbon grains, turning it into a weak biological filter with the organics locked in the deeper layers.
Carbon should be used only a few days a month False. This myth was likely started by activated carbon’s ability to remove yellow tinting and odor from the aquarium within the first 48 hours of application (or perhaps manufacturers who want to sell you more carbon). The higher concentrations of organics are colorless and odorless and require more contact time for removal. Another complication of part-time carbon use is storage and reuse. Once the carbon is removed from the aquarium it will continue removing contaminants from the air. Placing the damp carbon in a sealed plastic bag doesn’t work either, as the damp carbon becomes exhausted servicing die off in the stagnant aquarium water stuck to the grains.
Spilled carbon causes harm to the aquarium False. Carbon granules that are accidentally spilled into the aquarium will quickly become saturated with bacteria slime, having the same biological effects as a grain of gravel. It may look ugly, but it is totally harmless.
As we have seen, the use of Activated Carbon is an important part of maintaining a healthy marine or reef aquarium. It is the only filtering media that can remove substantial amounts of metabolic wastes (organics), which accumulate over time and can prevent secondary water quality and health problems in specimens. Because of the phosphate issue in lower quality products, it is better to spend a little more on a quality carbon than use any carbon at all.

Vinegar Dosing Methodology for the Marine Aquarium

Vinegar Dosing Methodology for the Marine Aquarium

Written by Cliff Babcock and Dr. Randy Holmes Farley


Why would you want to dose vinegar?

Reduce Nitrate


Proper vinegar dosing will decrease nitrate levels by increasing bacterial populations, which are then skimmed out removing the nitrate within their cells. The bacteria may also be a good food source for many organisms, including sponges, effectively taking nitrate from the water and incorporating it into the large organisms in the aquarium. The added organic matter can also be used by bacteria growing in low oxygen regions. These bacteria can use nitrate as a source of “oxygen” to metabolize the added organic, producing N2 gas. Other bacteria use the ANAMMOX process to convert nitrate to N2 gas, which dissipates out of the tank water. Vinegar promotes such processes in bacterial biofilms (masses) and other low oxygen areas. These process further reduce nitrate beyond their ordinary needs for nitrogen. This denitrification is the process that takes place inside of live rock and sand beds, and adding an appropriate organic carbon source that can penetrate these regions may spur the process.

Reduce Phosphate


Vinegar dosing like other carbon source dosing will reduce phosphate, however it is a very slow process compared to nitrate reduction. Why, because bacteria utilize omuch more nitrate than phosphate to grow and multiply. The denitrification process described above is another reason why the process may be imbalanced toward more nitrate reduction than phosphate reduction. It is the skimming out of bacteria or consumption of them by higher organisms that reduces phosphate. The ratio bacteria utilize for ordinary growth, and the ratio that likely comes in with many foods is very roughly around 16 parts of nitrate per 1 part of phosphate, which is based on the percentage of nitrogen and phosphorus present in the basic biochemicals that make up all living cells. The ratio can vary tremendously, but the point is that one should expect a lot of nitrate reduction for each unit of  phosphate reduction, even if cellular growth is the only process taking place..

For these reasons, if your phosphate is high and nitrate is low, then you should use another method like GFO to reduce phosphate back in line with the ratio above. Then vinegar dosing can be used to maintain the levels of nitrate and phosphate, but is not a preferred method to reduce high phosphate levels. Many folks may need to ultimately use an additional phosphate export method, such as GFO, even if the levels start out balanced because organic carbon addition can be imbalanced to more nitrate reduction for the reasons stated above.

Enhance Coral Coloration


I have not experienced any color changes in my coral while dosing vinegar. I have not seen many posts that claim vinegar helped with color changes. Perhaps it will with some SPS coral I do not have in my tank.

Reduce Cyanobacterial Growth


Scientific research has found that cyanobacterial growth does not increase when dosing vinegar (acetate), where it was found that ethanol dosing will increase cyanobacterial growth. Cyanobacteria produce PHA to store energy when needed. PHA is an ingredient in some biopellets. So cyanobacteria can utilize some if not all of the biopellets.  Hobbyists who have dosed vinegar have reported less cyanobacterial problems compared to dosing biopellets & ethanol. This was my experience as well.

Reduce Dissolved and Suspended Organics


Bacteria do utilize the dissolved and suspended organics in the water column, thus reducing the content to at least simpler forms. Bacteria will produce toxins and release them into the water column as well. Running GAC will help reduce the dissolved organics and toxins produced by bacteria.


What is the theory for nitrate & phosphate reduction using vinegar?

Bacterial growth and reproduction in a reef aquarium seem to be limited by the amount of available carbon. Simply put, vinegar adds more carbon which allows larger bacterial populations to develop when dosed. These bacteria may be wholly invisible to you when they grow hidden on rocks in refugia or on GAC, but they may also show up as blooms in the water colun or as a visible mat in the aquarium. They have to grow somewhere, so making a good place for them to grow out of sight (and possibly just upstream from a skimmer) may be a good way to prevent unsightly appearance of bacteria. When and how you dose may also impact where they grow. For example, dosing very slowly with a dosing pump just upstream from a large rock filled refugium may encourage growth there, where slow dosing the the display, or once daily bolus dosing anywhere might deliver the vinegar through the whole system and encourage visible growth in the display.
The added vinegar is encouraging bacterial growth. Therefore a good skimmer will help remove more of the free floating bacteria into the aquarium. Skimmers will not, however, remove the benthic growth of bacteria. If bacterial blooms occur it may be necessary to increase filtration with other methods such as using a diatom filter and/or filter bags.


What type of vinegar?


Use pure distilled white vinegar (5%) with no added ingredients that you buy from the grocery store. If this is not available where you live, use 98% food grade glacial acetate and dilute it down to 5%. Follow all labeled precautions when using glacial acetate since it can be hazardous.

How do you dose vinegar?

Methods for Dosing Vinegar


Vinegar does have a reducing effect on tank pH for shorter periods of time. Adding vinegar to kalk water will still have a high pH increasing effect on tank water. Therefore this is a good method to add vinegar when one is dosing kalk water to offset any reducing effect that vinegar may have. Keep in mind that when one adds vinegar to kalk water it will increase the alkalinity and calcium output when one adds more than two teaspoons (saturation point of kalk water) to 1 gallon of RODI water. For example if you add 3 teaspoons of kalk to 1 gallon of RODI water and also add 45mL of vinegar, it will increase your alkalinity and calcium output by around 1/3 - 1/2 more.
Dripping vinegar over longer periods of time is another fine method which slowly adds vinegar to tank water without increasing the pH by much. It is recommended to drip vinegar during daylight hours when pH is at its highest.
Increasing bacterial populations in tank water can rob oxygen from the tank water, so dosing the vinegar during daylight hours when oxygen is at its highest is best.
When dripping vinegar it is best to not dilute it too much or store the diluted vinegar too long since diluted vinegar can be broken down by bacteria in the dispensing vessel reducing the amount of carbon dosed. Dilution and delivery the same day is fine, but a 10% vinegar plus 90% water solution is not likely stable over the course of a week or two.
When vinegar is dosed in smaller amounts it is possible to add it in one or two doses per day manually. You will need to watch the pH decreasing effect to make sure it is acceptable. Again, it is best to dose in the early morning and before lights go out.

Amount of Vinegar to Dose


Dosing vinegar is similar to dosing ethanol except that vodka has more carbon in it than vinegar. The ratio is about 8 times more carbon in 80 proof (40% by weight) vodka than vinegar (which is usually 5% organic by weight). For a conservative method one may use the same guidelines for dosing ethanol in the article below, except use 8 (eight) times as much vinegar as ethanol for the 40% ethanol directions:

Vodka Dosing...Distilled!
By Nathaniel A. Walton (Genetics) and Matt Bjornson (Stony_Corals)

Genetics subsequently modified the vodka dosing regimen for vinegar using the guidelines in link above creating the chart below. The table below can be found in a more printer friendly version here.

vinegar_sm.jpg


In my experience, I started with using 15mL vinegar per 100 gallons of water volume and had no problems. I increased weekly by 15mL vinegar per 100 gallons up to 45mL per 100 gallons. Perhaps dosing higher vinegar amounts if necessary will work as well.
Watch for bacterial blooms in the tank water. If this occurs at an unacceptable level, cut the dose back and increase filtering. Such blooms are really only a problem from the aesthetic standpoint (and possible O2 reduction). The suspended bacterial might actually be good food for many of our tank organisms, and many people seem to believe that their tank populations of sponges increase when dosing organic carbon. The acetate in vinegar can be taken up by many higher organisms, including the zoox in corals and anemones. So very high doses can lead to browning of corals and anemones through increased zoox populations. If that happens, a dose reduction is recommended.
Once nitrate and phosphate are reduced to an undetectable reading (zero) using hobby grade tests kits, I find that watching the green algae growth on tank glass is a good indicator as to when you have reached a desirable level. In my experience, I find bacterial growth replaces algal growth on the tank glass. The bacterial growth appears whitish compared to green algal growth. The bacterial growth is much easier to clean away. If bacterial growth on glass becomes a problem, reduce the amount of vinegar you dose. Keep in mind bacterial growth has to occur somewhere within your tank where it can be removed. Randy has noticed an increase in bacterial growth on his GAC between changes. Using old GAC to grow bacteria on, while dosing vinegar, would make a good mechanism for increasing bacterial growth and allow them to be exported when cleaned off using fresh salt mix.

Vinegar Dosing Articles of Interest


Nitrate!

When most aquarists hear the word nitrates, what usually comes to mind is the whole “nitrogen cycle” thing. You remember this. Your fish take a poop and it breaks down into ammonia. Then the Nitrobacter and Nitrosonomas bacteria take over (which by the way, there is new evidence that proves these strains are NOT the ones responsible for the nitrogen cycle, so all those old books are now wrong). Ammonia is then converted to nitrite then finally to nitrate where it slowly accumulates and provides food for algae, turning your tank into a green mess.
waterqualitycyclingnitrogencycle.jpg
Without any controls, nitrates go nowhere- they just accumulate. When concentrations hit 5 ppm or more, it can fuel film algae, hair algae, and cyanobacteria. In a reef tank, stony coral branches and polyps usually get covered by hair algae strands and film algae. This will harm and often bleach out sections of the coral. It’s not that grave of a situation in a fish-only setup because most marine fish can tolerate higher levels of nitrate. But you will still wind up with unsightly algae growing everywhere.
Not all the nitrates in your aquarium comes from the nitrogen cycle. Nitrates are added with food and with water changes. Many organisms in your aquarium produce nitrates directly. This has nothing to do with the nitrogen cycle.
Nitrate levels in aquariums are much higher than those in the ocean. The average nitrate levels of the ocean is 0.1 ppm at depths up to 50 meters, and 2.5 ppm and higher in deeper regions. But in the South Pacific reefs where we get most of the creatures we want to keep, nitrate levels average around 25 ppb (that’s parts per billion) which is equivalent to 0.025 ppm. So here’s the first problem: a typical hobby nitrate test kit can only go down to about 1.0 ppm, which is a nitrate level 40 times higher than what we’re shooting for. If you test for nitrates and the test vial looks crystal clear and colorless, your nitrate level could still be a hundred times higher than the ocean levels.

Why Nitrates Are Bad
Aside from getting nuisance algae, nitrates are not healthy for fish or invertebrates. Everyone says that fish are not affected by nitrates. This is not true. Nitrates are toxic to fish. They will die from nitrate poisoning at higher levels. Fortunately, lethal levels cannot be reached even in the most neglected marine aquarium. Nitrates to fish are like arsenic to humans. You will die from it at a certain dose, but at low concentrations you will live a full life, albeit not a healthy one.
At around 100 ppm of nitrate, many fish show signs of stress, color loss, and suppressed appetite. There is no evidence that this is caused by nitrates or sister compounds that concentrate in aquariums when nitrate levels are this high. Nevertheless, most experts recommend that fish-only tanks be kept at 10 ppm or less, with an absolute maximum level of 25 ppm.
Surprisingly, reef tanks and most corals need nitrates to survive. The zooxanthellae present in all photosynthetic corals are algae. They need nitrates to grow. But when nitrate levels are too high, it causes an explosion of the zooxanthellae population within the host coral and in turn, actually decreases the rate of growth of the coral. This begins to occur in some SPS corals when nitrate levels reach a low 0.5 – 0.7 ppm. LPS and many soft corals can tolerate 3-5 times this concentration with no ill effect. At 5.0 ppm and higher, nitrates become poison to many SPS corals. To make matters worse, high nitrates cause runaway film algae which covers the skeleton and polyps of these corals, exacerbating the problem.

Where Nitrates Come From
The number one source of nitrates is feeding. Most nitrates come from the proteins in uneaten fish food that metabolizes into ammonia. Fish that consume the food stop the decomposition to ammonia and break the cycle. In other words, fish excrement does not contain any nitrates. Fish will eliminate the nitrates for you, as long as everything you put in the tank gets eaten. Fish feces will decompose to ammonia, but the levels are far less intense than an equivalent weight of uneaten frozen fish food breaking down in the water.
I cringe when I see someone throw a frozen cube into an aquarium. The liquid from commercial frozen fish food cubes contains food particles too small for fish to eat. It just decomposes into nitrates. In fact, the packing juices contain more nitrogen compounds than the food itself. It is important to defrost and rinse frozen fish food through a net before feeding. If you have a persistent algae problem, this could be the answer.
Feeding corals is more prone to nitrate production than feeding fish. Target feeding helps concentrate foods at the coral, but most of it winds up in the water column to decompose. The worst feeding technique is to dump filter feeding foods directly into the tank. A very small percentage may arrive at a polyp, and the rest just fouls the tank. But PLEASE- don’t stop feeding your corals for fear of elevated nitrates. There is no additive in the world like food to give your corals extended polyps, better coloration, and an overall healthy appearance. You need to balance nitrates from food with effective ways to remove it.
Another source of nitrates are microscopic life forms that are constantly dying in your tank and decomposing. There isn’t much you can do to reduce this source of nitrates, but keeping ORP and PH high will speed the denitrification process. Of course, the death of a major organism like a fish or coral will cause a much greater nitrate spike. Don’t ever let a specimen “decompose to nothing” in your aquarium. Besides nitrates, other toxins and organic compounds are produced that will take a long time for your tank to recover.
Another source of nitrates is make up water. The US federal government allows up to 44 ppm of nitrates in drinking water from municipal sources. If you’re on a well, nitrate levels are not regulated at all. This could be a significant source of nitrates in your aquarium. Ask your water company for a free water analysis report. I don’t recommend testing your tap water yourself using your aquarium nitrate test kit because of the limitations in low level accuracy.
You don’t need a reverse-osmosis unit to remove nitrates, just a deionizing filter. Products such as the Aquarium Pharmaceuticals Tap Water Purifier works well. You can also purchase water from RO/DI machines found outside of major supermarkets and department stores. RO/DI water is the best defense you can have against nutrients, heavy metals, dissolved organics, and other compounds that wreak havoc in an established aquarium.

How to Get Rid Of Nitrates
Before we had high tech equipment and fancy chemical additives, most aquarists used water changes to dilute nitrates. For moderately stocked tanks, this is still the best defense to keep nitrates under control. In addition, measuring nitrate levels is a great way to tell when a water change is due. Choose a goal of say 5 ppm. Test your tank regularly. When nitrates reach your goal, it’s time for a water change.
If your tank is heavily stocked with fish and/or corals, water changes alone may not be able to keep up with nitrate production. You will need to supplement water changes with some form of biological or chemical control. Here’s a list of common nitrate reduction methods that can help rid your tank of nitrates:
Live Rock This is the most inexpensive nitrate reactor on the market. It comes free when you buy a piece of live rock. The internal “nooks and crannies” harbor bacteria that are forced to live in anoxic (oxygen poor) conditions. The bacteria reduce nitrates to nitrogen gas. The only drawback to live rock nitrate reduction is that the filtering capacity is very weak. Even with strong tank circulation, 50 pounds of live rock may be able to process only 2-3 ppm of nitrates daily.lr2.jpg

Macroalgae – All algae, including macroalgae feed on nitrates. It is has been found that Caulerpa sp. Prefer to feed directly on ammonia. The good news is Caulerpa will prevent some of the ammonia in the tank from becoming nitrates. The bad news is that adding lots of Caulerpa won’t necessarily reduce existing nitrates. Still, any macroalgae in the tank will certainly help reduce nitrates and phosphates. Macroalgae also competes well against hair and film algae, minimizing its growth.
Algae Scrubbers – These devices have been used in public aquariums for years. They consist of plates that are sprayed with tank water and exposed to bright lighting. All forms of algae grow on the plates. The plates are periodically removed and the algae is cleaned off and discarded. While very effective, the typical home aquarist doesn’t have the room for this kind of setup. A less effective but adequate alternative is to use a refugium where various algae can grow undisturbed and be harvested regularly.
Protein Skimmers – A quality skimmer can remove ammonia, nitrites, and nitrates directly. The whole concept of the Berlin method is to combine live rock with a large aggressive skimmer as the only means of filtration. Such a setup is a powerful combination to combat the constant build up of nitrates. Many aquarists fail to get the Berlin Method to work for them, simply because they employ an entry level, poorly designed skimmer that does little more than aerate the water.
Deep Sand Bed – Deep sand beds make excellent nitrate reactors. The way they work is that the deepest portions of the gravel do not receive replenished oxygenated water and become anoxic. This causes the bacteria to use a nitrogen molecule as an electron receptor instead of an oxygen molecule, and the result is the bacteria electrically transform the nitrate molecule (NO3) into nitrogen gas (N2). The gas is partially dissolved in seawater but then is quickly released into the atmosphere as it hits the water surface.
dsb2.jpg
DSB’s are extremely efficient nitrate reactors and can handle very large loads, perhaps 5-10 times greater than live rock alone. In-tank DSB’s have lost popularity due to misunderstood maintenance practices. Modern day DSB’s place the sand bed external to the display tank. These are typically DIY units made from deep containers (i.e., a Rubbermaid trash can) filled with sand and drilled with two bulkheads on opposite sides of the top of the container. Water passes over the top of the gravel bed just like an in-tank DSB. Nitrates permeate to the bottom of the gravel bed and are assimilated by anaerobes.
Coil Denitrators – These units used to be very popular 10-15 years ago, They are simple to build and easy to operate. I believe their popularity has waned due to DSB’s appearing in the late 80′s.
coil_nitrate.jpg
Basically, coil denitrators consist of a long coil of tubing (for example, a 100 ft roll of airline tubing). The end of the tubing goes inside an air tight chamber containing bioballs or other material with lots of surface area. The way they work is this. Aquarium water is slowly pumped through the tubing. By the time the water reaches the end all the oxygen has been consumed by bacteria growing on the inside walls of the tubing. The water then drips out over the bioballs that are covered with anaerobic bacteria.aquamedic.jpg

To increase the efficiency of coil denitrators, you need to feed the bacteria with a carbon source such as methanol, sugar/glucose, or vodka. Commercial units let you add the food directly to the inner chamber containing the bioballs. Some units contain specially made bioballs (I.e., Deni-Balls) that are filled with carbon food. For DIY, you can just dose the tank directly. I built my own coil denitrator several years back and was amazed how well it worked on a heavily stocked fish aquarium. However, one time I accidentally turned the valve open too much and let the water rush through the tubing. Within seconds all the anaerobic bacteria in the center chamber died (oxygen kills anaerobes). I pretty much had to wait a month for the denitrator to cycle again before it would start removing nitrates.
Chemical Nitrate Reduction – Chemical nitrate removers have been around a long time. Zeolite is a 50 year old product used in freshwater aquariums (and kitty litter) that adsorbs ammonia and other forms of nitrogen. It doesn’t work well in saltwater because of the complex ions that saturate the media very quickly. Carbon removes some nitrates, though it is much better at removing organic compounds. Products such as Chemi-Pure, Polyfilter, and Purigen do a good job of removing nitrates.
Probably the best product for nitrate removal today is an additive called AZ-NO3 (Absolute Zero Nitrates). I’ve used AZ-NO3 several times in problem tanks where algae has gotten out of control. The results are nothing short of amazing. I call this product the “second chance” additive, because it will turn the clock back to the day you first setup your tank. Within a month of the first dose, you will see pure white gravel, ultra clear water, no film or hair algae anywhere, plus the cleanest looking live rock imaginable. AZNO3 is an expensive product so you wouldn’t want to use it continuously. But to get a fresh start on a dirty tank, it can’t be beat. I urge every to try AZNO3 at least once. If for nothing else, just to see the remarkable effects of zero nitrates in your own aquarium.
az3.jpg
Bio Blocks – There exists a continuing misconception in this hobby that bioballs are “nitrate factories”. The fact of the matter is that the same amount of decomposition occurs in your aquarium whether bioballs are present or not. The exact amount of nitrates are produced either way. The problem with bioballs is that nitrates are produced on the bioball surfaces, then they must find their way to the place where the denitrifiers live. In most setups this is the inside surface areas of live rock. When nitrate is produced in high concentrations on the surface of live rock, it is more likely to diffuse in situ to the deeper portions of the rock where in can be turned into nitrogen gas. Bioball-generated nitrates simply miss out on the opportunity to be converted because it can’t find the denitrators.
Other media with large surface areas such as Bio-wheels and even filter pads work the same way. It is important to replace mechanical filtering pads or filter bags frequently (at least once a month) to prevent them from becoming efficient biological filters. Even old activated carbon will harbor nitrifying bacteria once the carbon is exhausted and the pore structure becomes filled with organics.
To overcome these problems, people have tried different things to replace bio media. One alternative is to fill the wet/dry chamber with live rock rubble. As long as it stays wet from the trickling water flow, the rock remains viable even though portions of it are out of water. But because live rock is a weak filter, you can never achieve the same filtering capacity as bioballs. There are several new products on the market that overcome this. They provide areas for both nitrifying and denitrifying bacteria in the same media. The Cell Pore product is made from ceramic that has been heated to a molten state and then heavily aerated as it cools, which turns it into a sort of “foam” rock. It contains thousands of holes and deep crevices- a similar structure to natural live rock.
bioblock.jpg

Water trickles over the material and provides biological filtration on the surface while the deeper pores harbor denitrifiers to eliminate nitrates. For most setups with moderate to heavy bioloads, this product can’t be beat.
Sulfur Denitrator- Sulfur filters have typically been used in public aquariums but only recently have become popular in the home. They consist of a recirculating canister and input/output drip lines similar to a calcium reactor. The canister is filled with elemental sulfur in the form of small beads. Bacteria feed on the sulfur and in the process convert nitrates to nitrogen gas. These filters need to be cycled just like a new tank. They require a month or so to grow sufficient bacterial colonies on the surface of the beads before they operate. The effluent water from a sulfur filter can become quite acidic, so most units pass the water through an aragonite bed before returning it to the tank. In a sense, you get a free calcium reactor. But I suspect the amount of dissolved calcium and carbonates in the effluent is too low to make much of a difference.
I have just started experimenting with a sulfur filter, an H&S Model 110SR that was loaned to me by Eric Edwards of FinsReef (www.finsreef.com). Once cycled, I will certainly publish my findings.

Marine Ich Epidemic - By The Reef Geek

crypto2.jpg
In 1977, I set up my first marine aquarium. In those days, there was no live rock or even aragonite substrates so the method was very different from what we use today. The typical setup included crushed oyster shell or dolomite for gravel, placed over an undergravel filter (Nektonics ruled back then) using 1-inch lift tubes driven by limewood air diffusers. If you had the money, you would get a canister filter and have a really sweet setup. Lighting was standard T12 fluorescent fixures with daylight bulbs (5000K).
Like most beginners, I had no idea what I was doing, and I really didn’t want any advice from anyone. I figured, how hard can this be? Shortly after my very first setup was complete I fully stocked the tank. I got Ich.
I watched all the fish die.
That was 30 years ago. On a recent trip to a local LFS, I purchased a Pearly-Scale Butterfly fish. After being placed in my quarantine tank, I noticed it definitely has Ich. Fortunately, I’m a lot smarter now and the fish was promptly treated, released from quarantine, and has been doing fine in a community tank ever since.
Marine Ich has been running rampant in this hobby for at least 30 years, perhaps much longer. Surely in this amount of time the importers, the exporters, industry support groups, or even LFS’s would have gotten together and figured out how to wipe out this parasite from the supply chain. But they haven’t. It keeps propagating (and surviving) from the South Pacific holding tanks to your living room aquarium. There are procedures such as dips and medications that can stop Ich in its tracks. But this doesn’t look like it’s going to happen anytime soon. The ornamental marine business is a rag-tag industry of rogue fish collectors and corrupt, unregulated island-countries. When clownfish sell for $0.03 each at the dock, there isn’t much incentive to install treatment facilities. The bottom line is that it is your responsibility to deal with Ich on any fish you buy.
Do not think for one minute that a fish with clear fins in your LFS’s tank does not have Ich. The parasite normally attaches to the gills first, which cannot be seen. And not all fish scratch when infected with Ich. Many LFS’s use copper in some or all their fish holding tanks. This is an excellent measure to minimize the spread of the disease, but it does not necessarily prevent the parasite from coming home with you. First off, the copper concentration may have drifted below its therapeutic level. the knee at which copper kills the parasite is very slim. Secondly, it takes at least 7 days for attached cysts to dislodge. If the fish hasn’t been at the LFS very long, the copper won’t have enough time to work.
I don’t know what the odds are of buying a fish today infected with Ich, but talking with fellow aquarists across different parts of the country, the consensus seems to be approximately 2 out of every 3 fish either have Ich or a related life-threatening parasite (i.e. Oodinium) when purchased. Folks, this is an epidemic. If this was happening to humans, the world would be in deep shit. Such a statistic makes cancer and heart disease look like the common cold.
So here is my (and your fishes) survival guide on how to beat Ich and get it out of your house once and for all. First, Let’s review some myths and truths:
(1) Ich is always present in an aquarium- WRONG. Ich doesn’t come in with dry salt mixes or lands in your tank from the atmosphere. Ich is a single-celled animal that is introduced to your tank, usually attached to a new fish or free swimming in the shipping bag water.
(2) Ich cannot be killed or completely wiped out- WRONG. Ich is an Obligate Ectoparasite. This means that without a host (a fish), it will die of starvation within 6-8 hours.
(3) Cleaner Wrasse (Labroides Dimdiatus) and Cleaner Shrimp (Lysmata Amboinensis) eat Ich- WRONG. Wrasses and shrimp eat necrotic tissue, damage scales, and scabs. It has been well documented that the symbiotic “cleaning stations” in the reefs by wrasses and shrimps are there to help heal wounds from carnivore attacks, territorial fights, and other skin/scale injuries. It is possible that these cleaners might knock the parasite off the fish while doing this, but do nothing to control the reproduction and life cycle of Ich in your aquarium.
(4) Fish eventually get immune to ich- TRUE. After repeated exposure and survival, fish build an immunity to Ich. However, new introductions don’t have this immunity and often die of Ich within a week of introduction, even though every other fish is fine. You will blame your LFS for selling you a fish with Ich, but the problem is Ich is present in your tank and your fish have gained some immunity which prevents fatalities- but they still suffer from the disease.
(5) Stress causes Ich- WRONG. If Ich is present in your tank then stress reduces immunity and your fish will show more advanced and serious signs of the disease. But if Ich is not present, it doesn’t matter how stressed your fish get they won’t get Ich.
(6) Freshwater dips eliminate Ich- WRONG. Freshwater dips may cause gill attached parasites to dislodge, but do not effect epidermal parasites. These are protected by the fishes own mucous layer. You may reduce the discomfort of scratching, but you will not prevent the cysts on the skin from dropping off and reproducing in the gravel.
Life Cycle of Ich
Before I cover how to kill them, let’s look briefly at how they live:
  • Free Swimming – The Ich parasite swims around your tank looking for a host. If it can’t find a fish within 6-8 hours, the parasite dies of starvation.
  • Attachment – It finds a fish and attaches to the skin or gills. It stays put and feeds off the fishes body fluids for 4 days.
  • Encystment – The parasite is now nourished and encased in a hard shell. It drops off the fish. The cyst floats around the aquarium for up to 18 hours looking for a place to settle down.
  • Reproduction – Once settled in, the cyst begins to reproduce (by cell division) splitting about 9 times which produces roughly 500 baby parasites within the cyst. This can take up to 28 days.
When the cyst breaks open, all the parasites start swimming around looking for a host, and the cycle starts over again.
crypto3.jpgTreatment and Elimination
The only time you can kill Ich is when it is swimming around. When it is inside the cyst or attached to a fish, no medication or method can be used that would be equally harmful to the host fish.
First thing you need to do is remove ALL fish from the aquarium, including those that do not show any signs of the disease. Put them in another aquarium with established biological filtration. Purchase a copper treatment (such as Seachem Cupramine) and follow label directions.
Keep your display tank fallow (without any fish) for 31 days. There is new evidence that suggests raising the temperature of the display tank to speed the life cycle of the parasite is a bad idea. This will cause some  cysts to go into a long stasis period, perhaps several months. So do not raise the temperature of the display tank. Public aquariums go 6 weeks to ensure resistant strains are fully wiped out.
After 31 days (or longer), return all the fish to the display tank. The copper treatment in the holding tank should have killed any parasites that were on the fish when originally transferred.
That’s it. You’re done.
Ich has gotten so bad the last few years that I now recommend a prophylactic copper treatment for at least a month on all incoming fishes. For me, the hassle of removing fish from the display tank far outweighs the inconvenience of a 30 day quarantine.
Finally, this question always come up, ” What about the reef-safe medications I can buy?”
There is no such thing as a 100% effective reef-safe Ich medication. These products are marketed to prey on the aquarist’s anxiety and fear of having to catch and remove fish from a reef tank. The metradinazole-based medications (Ruby Kick-ich, Flagyl) works great for freshwater icthyphonus but does nothing in saltwater. Pepper-based products (Kent RxP) that cause sloughing of mucus makes the spot go away and the fish looks better. But the cyst will still hatch 2 weeks later and the infestation starts over again. Garlic and other herbal immune system boosters are at best, anecdotal. Copper is the only proven medication with a 50 year track record of a 100% kill of parasites.

Tuesday 10 April 2012

Keeping acropora – Dosing Ca, KH, Mg


Keeping you acropora and other SPS healthy and colorful
Acropora is the most complicated coral in our opinion and requires more attention than LPS and Soft corals.  
We will not go in to the complicated explanations and scientific terms in this blog. This is to help reef keepers start with SPS corals.
We presume you have some experience with reef tanks and already have good lighting and reliable filtration in your reef system.
So where to begin? First of all you need to make sure you are keeping a stable level of Calcium, KH/Alkalinity and Magnesium in your tank. This is very important as hard corals do not like drops and rapid increase of these elements. Many reefers dose Ca, KH, Mg manually once or few times a week, this may cause a shock for acropora and other SPS corals.
We would recommend you to consider a dosing pump and/or calcium reactor.

Our personal choice is dosing pump. We dose all three elements daily.
We stick to “Randy’s Mix” you can find full information on this mix here http://www.reefkeeping.com/issues/2006-02/rhf/index.php
Our preference is recipe #2. All supplements are sold by Aquaworld


1. Calcium.
To make one litre of Calcium mix:
Use 70grams of calcium chloride dehydrates per one litre of water. Mix it until dissolved and solution is clear.
This mix will contain about 18,500 ppm in calcium

2. KH
To make one litre of KH mix:
Use 76grams of of baking soda per one litre of water
This mix will contain about 950 meq/L of alkalinity (2660 dKH). Make sure baking soda is totally dissolved and solution is clear. It can take you a while to achieve clarity

3. Mg
Dissolve 450grams of Epsom salts (can be bought in any Pack&Safe) and 833grams of magnesium chloride hexahydrate in 3.8 litre of water. Mix it until dissolved and solution is clear.
This solution will contain about 47,000 ppm magnesium, 70,000 ppm sulfate and 86,000 ppm chloride.
Dosing:
Before you set up dosing intervals and amounts you need to understand how much your tank is consuming of each ingredient.
Once your dosing pump is ready we recommend you to test your tank water for Ca, Kh, Mg
Adjust your levels accordingly:
Ca – 420ppm
KH – 8dKH
Mg – 1300ppm
We recommend you start dosing in the morning from small dosage. For example:
Ca and KH 5-10 dosing per 24hours. 5ml each dose.
Mg 2-6 dosing per 24hours. 3-5ml per dose.

So, you do the test in the morning and start dosing. Now your next mission is to test your Ca, KH and Mg levels twice a day (in the morning and at night) for the next week and adjust your dosing amount accordingly.
Your goal is to achieve constant level of those 3 important elements in your tank. You would need to bring your dosing amount up or down for each supplement, regarding if you ppm going up or down.
Once you have stabilised your dosing, keep testing regularly, usually we do our tests once a week.